
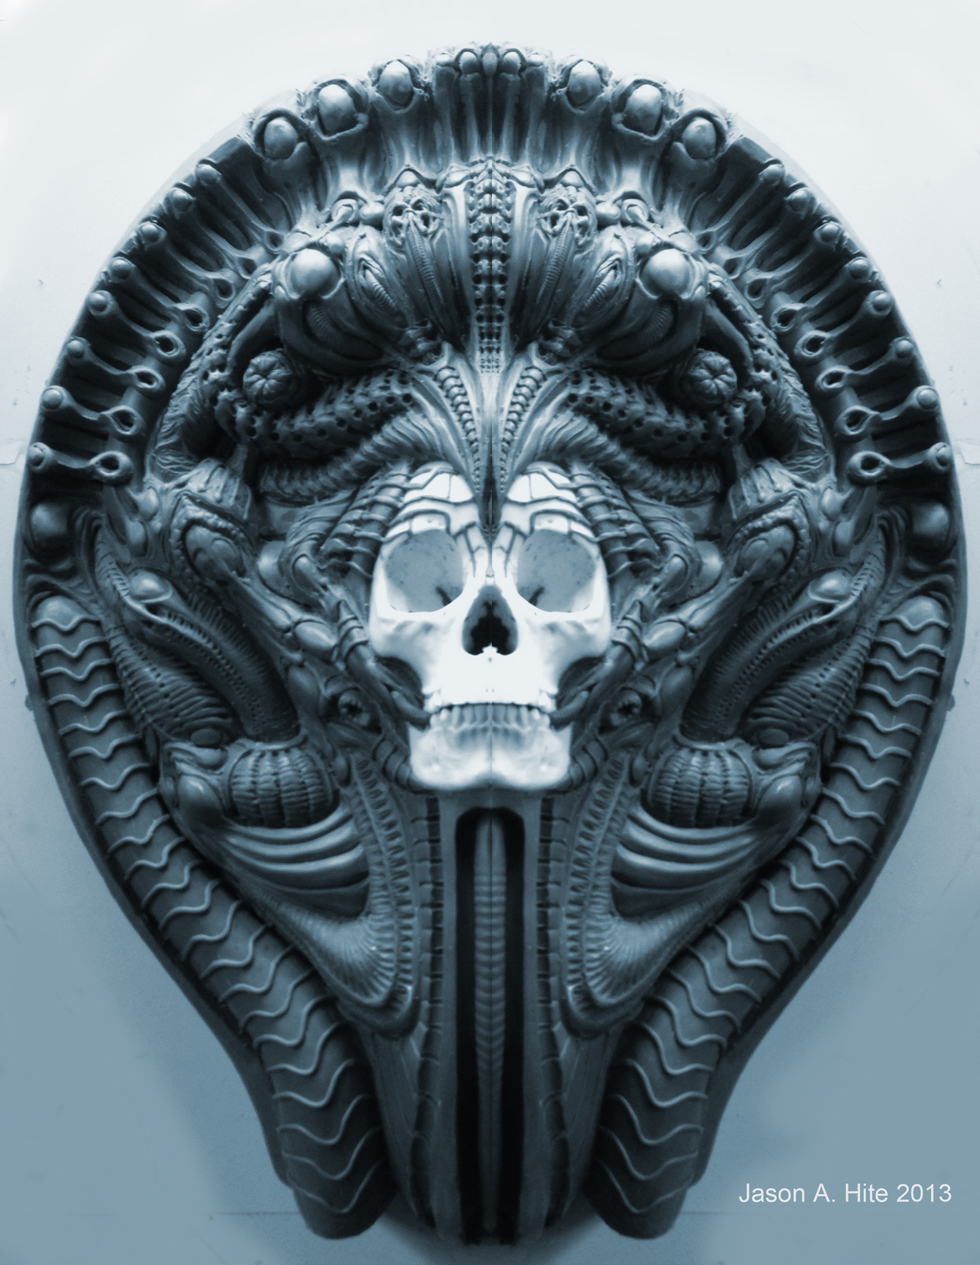
behind the veil
Bronze
23" x 18" x 5.5"
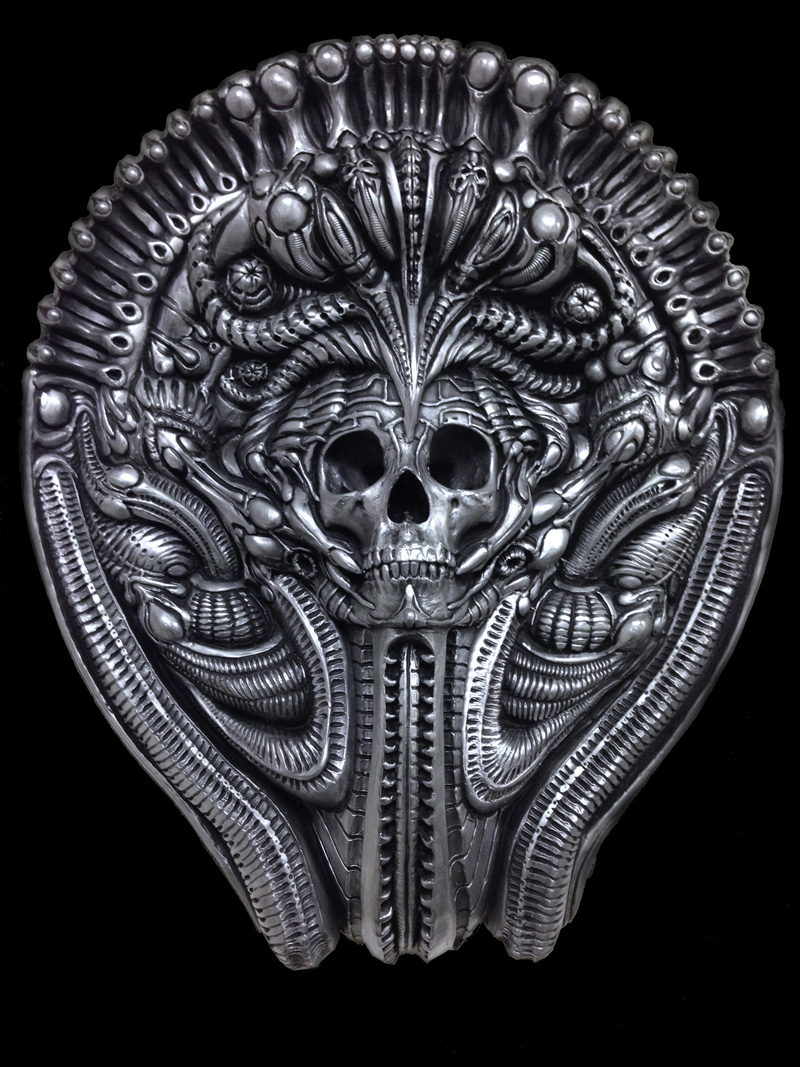
This sculpture represents two aspects of existence. Life and death. Above it the final death image, “Behind the Veil”. It was a very long process to get here though. See below to see my journey.
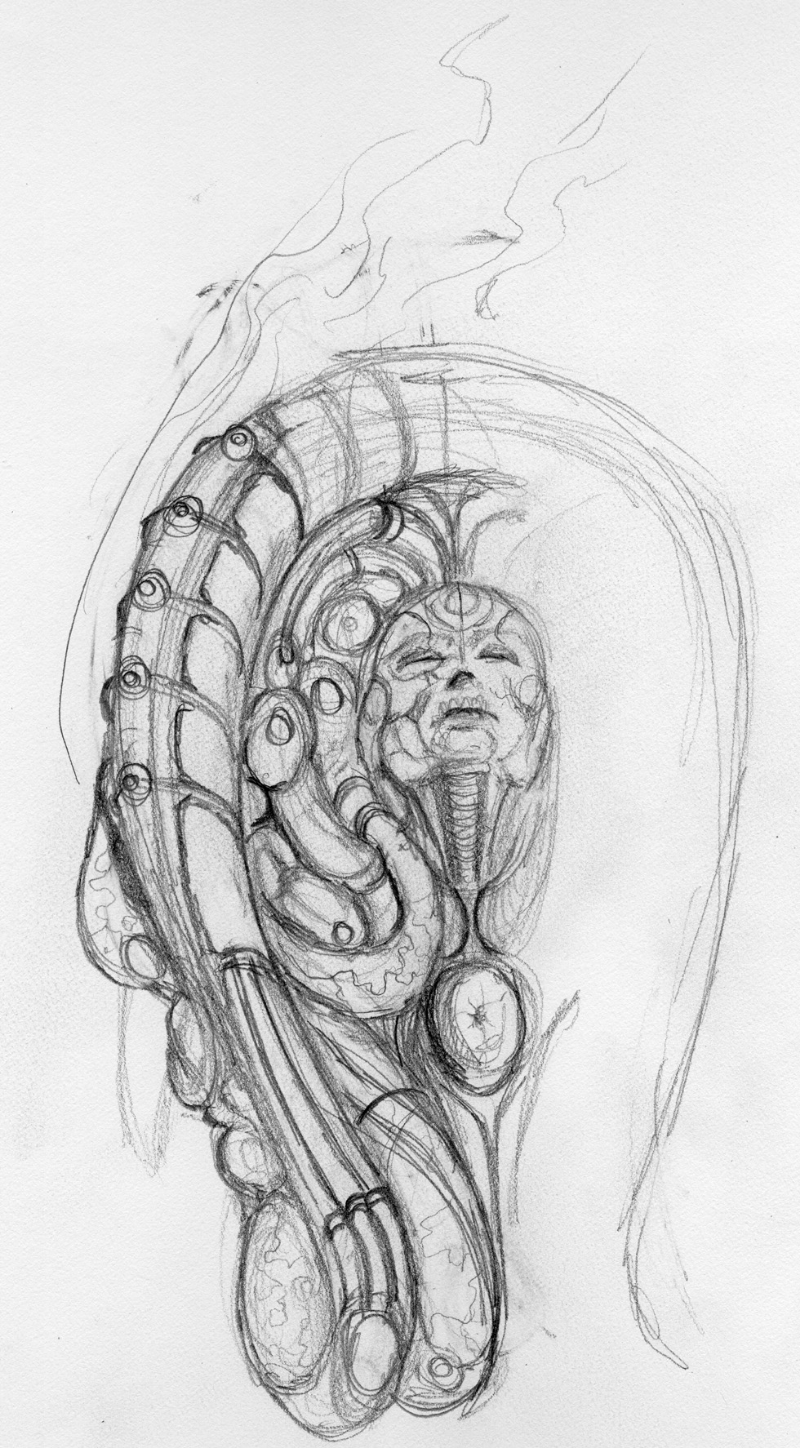
This was the original sketch I did. When I embark on a sculpture like this I tend to use the sketch as a road map not a blueprint. The final result always ends up being something like what I originally envisioned but my journey takes me in different directions sometimes.
Here is the nearly completed first sculpt I did called Bliss. Sculpted in Monster Makers Clay. This is life in its full bloom.

About to remove the fiberglass jacket from the case mold, clean it up and pour the silicone.

Here is the fiberglass jacket popped of revalin gthe 3/8” layer of clay between the sculpture and the outer jacket. Once I pulled this out the jacket was carefully placed back on top of the sculpture and sealed down. Then liquid green silicone was poured into the new cavity. Once the silicone set in about 16 hours, presto, the first mold was born!

Here was have the first casting made in a semi translucent resin. The mold is rather large so in order to get all the detail without filling the mold solid, I have to rotate the piece with small batched of liquid resin. It usually sets in 2-3 min. We call it driving the bus. It looks like I’m turning a massive buss wheel as I rotate the mold. A rather cumbersome and tedious process, but the results are worth it.

With the first casting in hand, I made a simple backing plate out 1/4” of compressed particle board. I embedded four white LED light pads into the board. You can also see the color changing strip’s control box I’m about to mount. More on that later,

Here is the fist lighting test with the 4 LED light pads.

Here we have a layer of silver “Rub and Buff” paint applied to the high points. Fun stuff to paint with.

This is where it gets tricky. Above is an image of the back of the sculpture. Here, I identified the low spots and other areas on the surface that I wanted the white LED’s to shine through and painted them in liquid latex on the back.

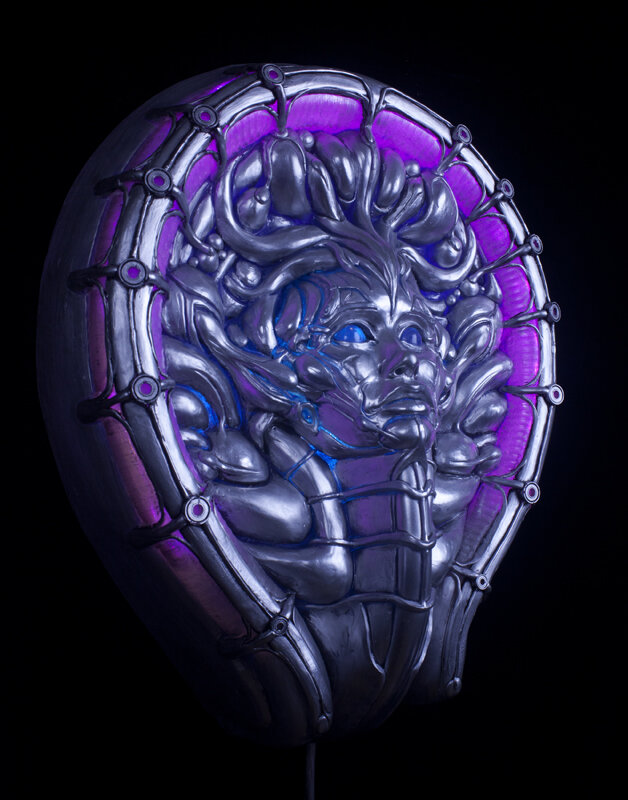
After the masking latex areas dried I spray painted the entire inside surface black. Once it dried, I carefully pulled off the latex exposing the unpainted areas and liberally coated them in a translucent blue paint. Maybe 2 or three coats. The image above also shows the outer rim I lined with an additional 40” LED color changing strip which connect to that control box on the back panel.

After the long process of molding, casting, engineering the paint and mounting lights,” Bliss”, comes to life! The color changing effect on the outer rim is hypnotic while the center blue area remains a solid vibrant blue. She hung in Santa Monica’s Copro Gallery 25th anniversary group show . I was so honored to be among some spectacular art and artists!

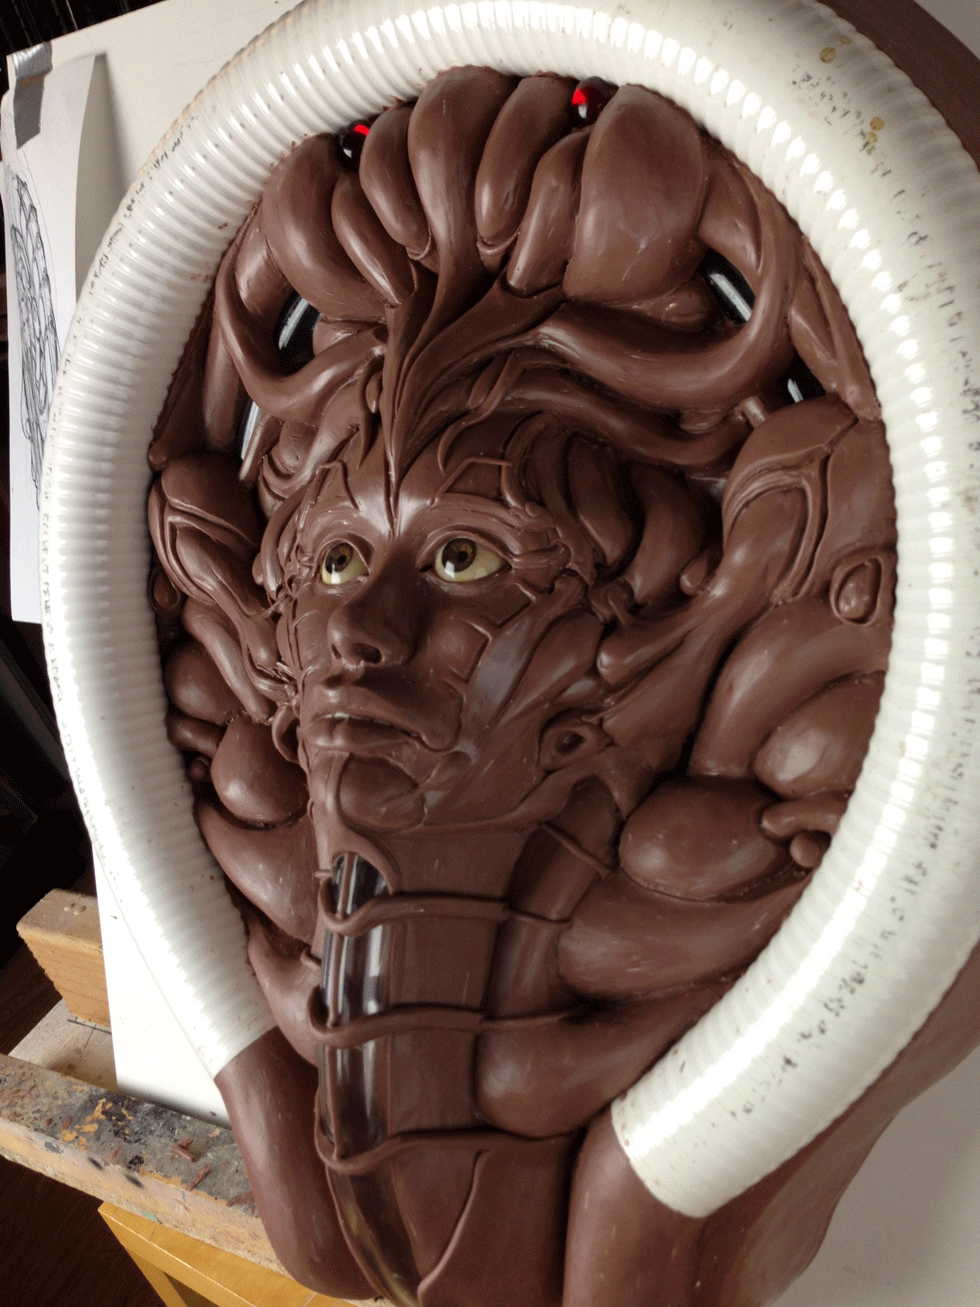
Now that “Bliss is finished it was time to start the its counterpart. “Behind the Veil” which represents death of the physical body. I slowly peeled away the clay revealing the female anatomical skull underneath and began adding details to the existing shapes from bliss.
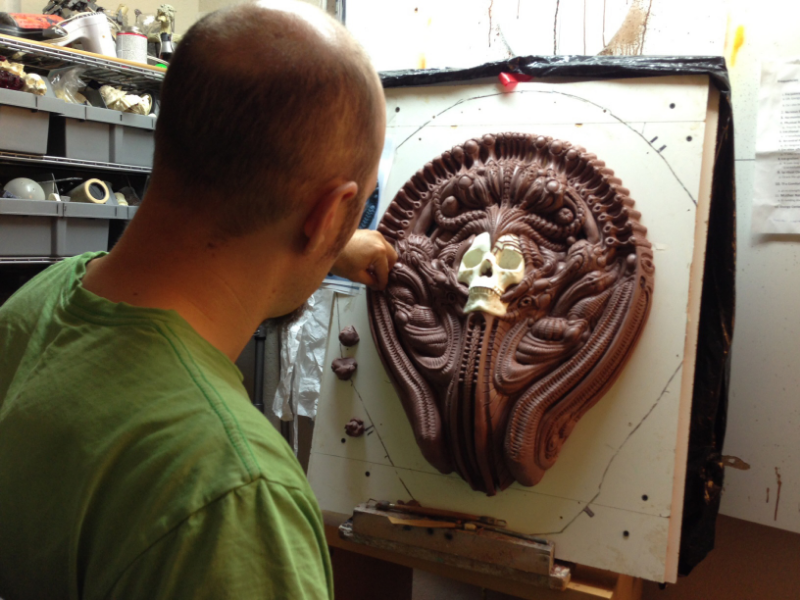
Weeks go by and now I am in the home stretch of the new sculpt!
After I fished half of it I took an image and flipped it to help me finish the other half. Having an image of the mirrored side was an immense help.

After going through another mold here I am painting one as a live demo at a comic convention in San Diego. This particular piece ended up as a base for Cris Velasco’s Shiva (Madonna) sculpture. A bronze version of this piece (the very first image of this thread), hung in the Copro Gallery’s Conjoined, curated by Chet Zar in 2013 and was also featured in Juxtapose Magazine for promoting that gallery show.