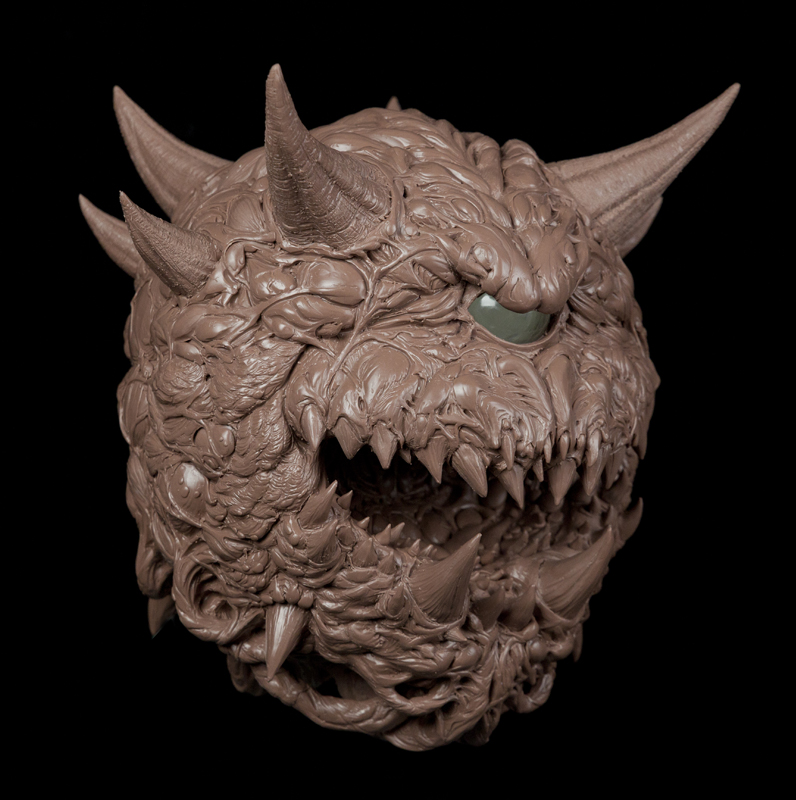
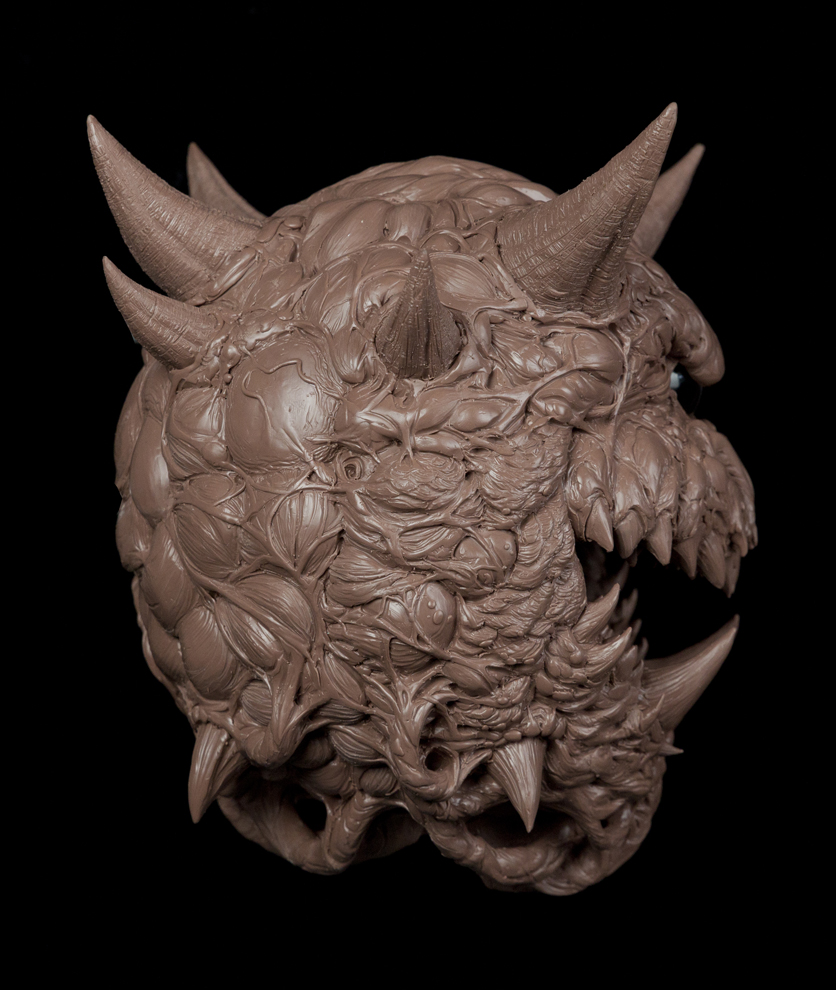
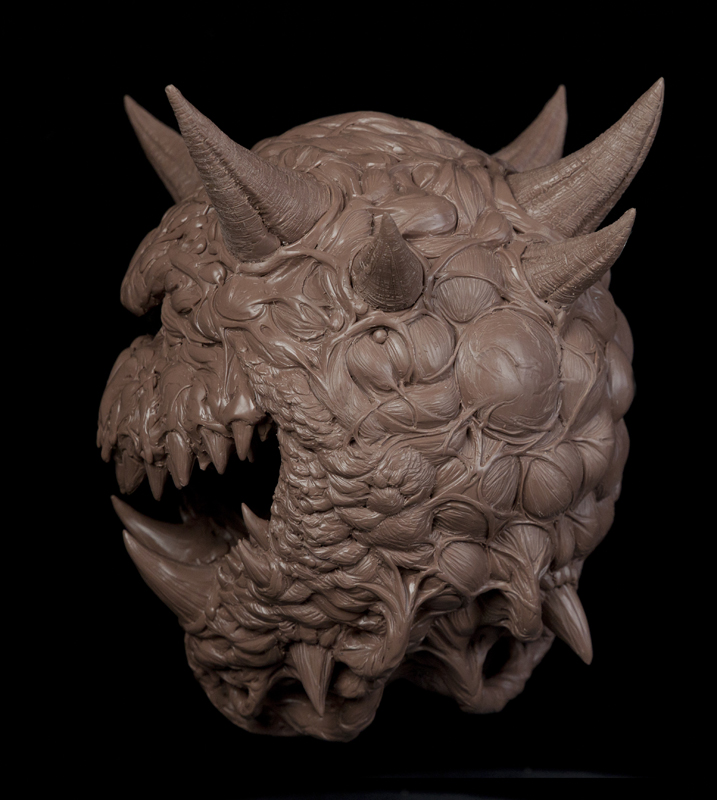
My obsession with the 1993 video game DOOM continues. Back in November of 2014, I had this grip of inspiration to make 1 of the classic DOOM monsters at a large enough scale to look somewhat realistic. I had so much fun sculpting a small 2" version for "Icons of DOOM" in 2 hours, I thought it would be crazy fun to make a 12" version. It was fun but I severely underestimated just how long and how much work it was to make her. People sometimes get upset when I charge $3500 for a sculpture and don't understand all the time and materials that go into making something like this. Oh, and yes, I said her. I believe that these creatures are female, based on the DOOM sprites I referenced.
I started with a simple 10" styrofoam ball. After carving the mouth and eye socket, I mounted it to a base and coated the ball with a 2-part urethane resin to help seal the styrofoam. I jammed on the clay using Monsterclay, which is an oil-based clay. Little by little, I picked away at the details and shapes and slowly found my version of this sinister beast.
Here is a quick 17 second turnaround after my first 2 hours or so on starting the detail.
I started with the inside cavity of the mouth and slowly worked my way out. It was tricky as hell to do this and I wish I had made the lower jaw removable. Good thing I have skinny fingers!
Above is an image of first-person sculpting! After what seemed to be months and months of a little sculpting here and a little sculpting there, I managed to make my way through this strange 360 ball of pure, intense detail. The horn textures were inspired by a bitchin' horn I acquired at Disguise, my old job, sculpted by Miles Teves for a film that never saw the light of day called "This Present Darkness". Years ago, my old boss Paul Palmeiri brought this horn into work and told me about some of the monsters and designs he had a hand in. If I recall correctly, it was being done at Cannom Creations Inc? The film was based on the book by Frank Peretti and supposedly had loads of demons in it. One day Paul managed to throw some resin into a horn mold from one of the suits they made and now I've been holding onto that freaking horn for years! The subtlety of details and dynamic form always amazes me. Miles is such an amazing artist it boggles my mind. Have a look below, I can only imaging what the rest of this monster's body looked like. I owe a lot of my success in sculpture to Paul Palmeiri. He taught me a lot about sculpture and was always pushing me to the next level when he was my boss.
So this little demon ended up with 12 horns and a shit-ton of teeth. I really wanted to make this Cacodemon my own and bring as many details out as I could. The original inspiration for id when developing this creature for DOOM was a painting by Jeff Easley. I believe Kevin Cloud or Adrian Carmack partially pixelated the image from Advanced Dungeons and Dragon's 2nd edition Planescape manual. The creature in the image is called an Astral Dreadnaught. Check it out at the link here. I wanted to pay homage to that original Jeff Easly painting as well and was at the forefront of my mind when coming up with the textures on my Cacodemon.
The most difficult part of this project was trying to figure out how the hell to mold it! I started by cutting off the horns and larger teeth. Doing this simplifies the basic shape. Horns and pointy objects are tricky to cast out of a mold successfully without any air bubbles in the tips. I'll talk more on that later.
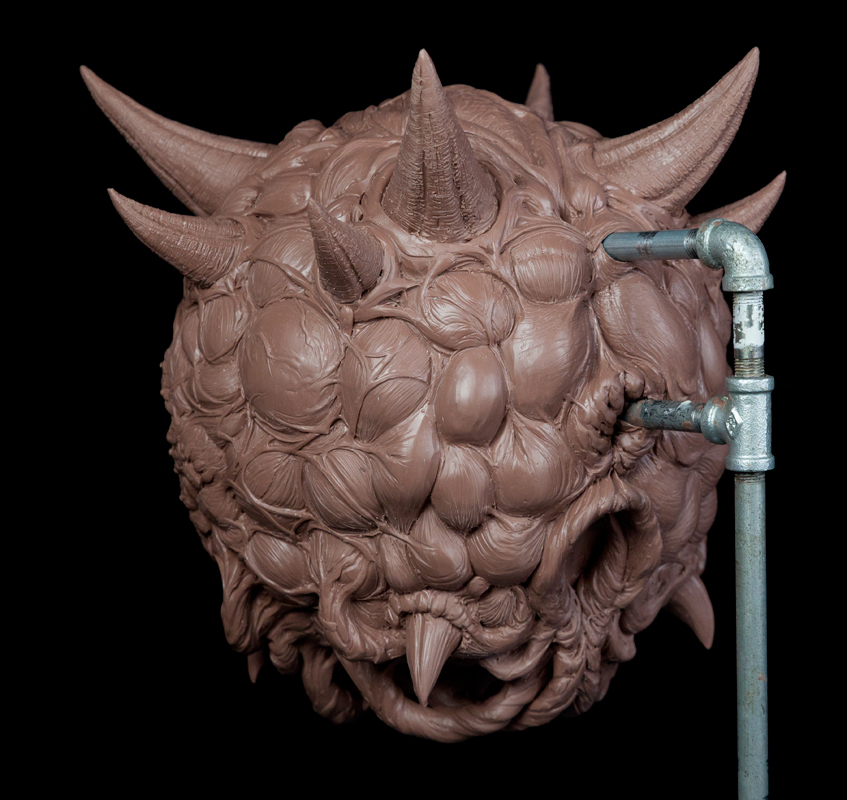
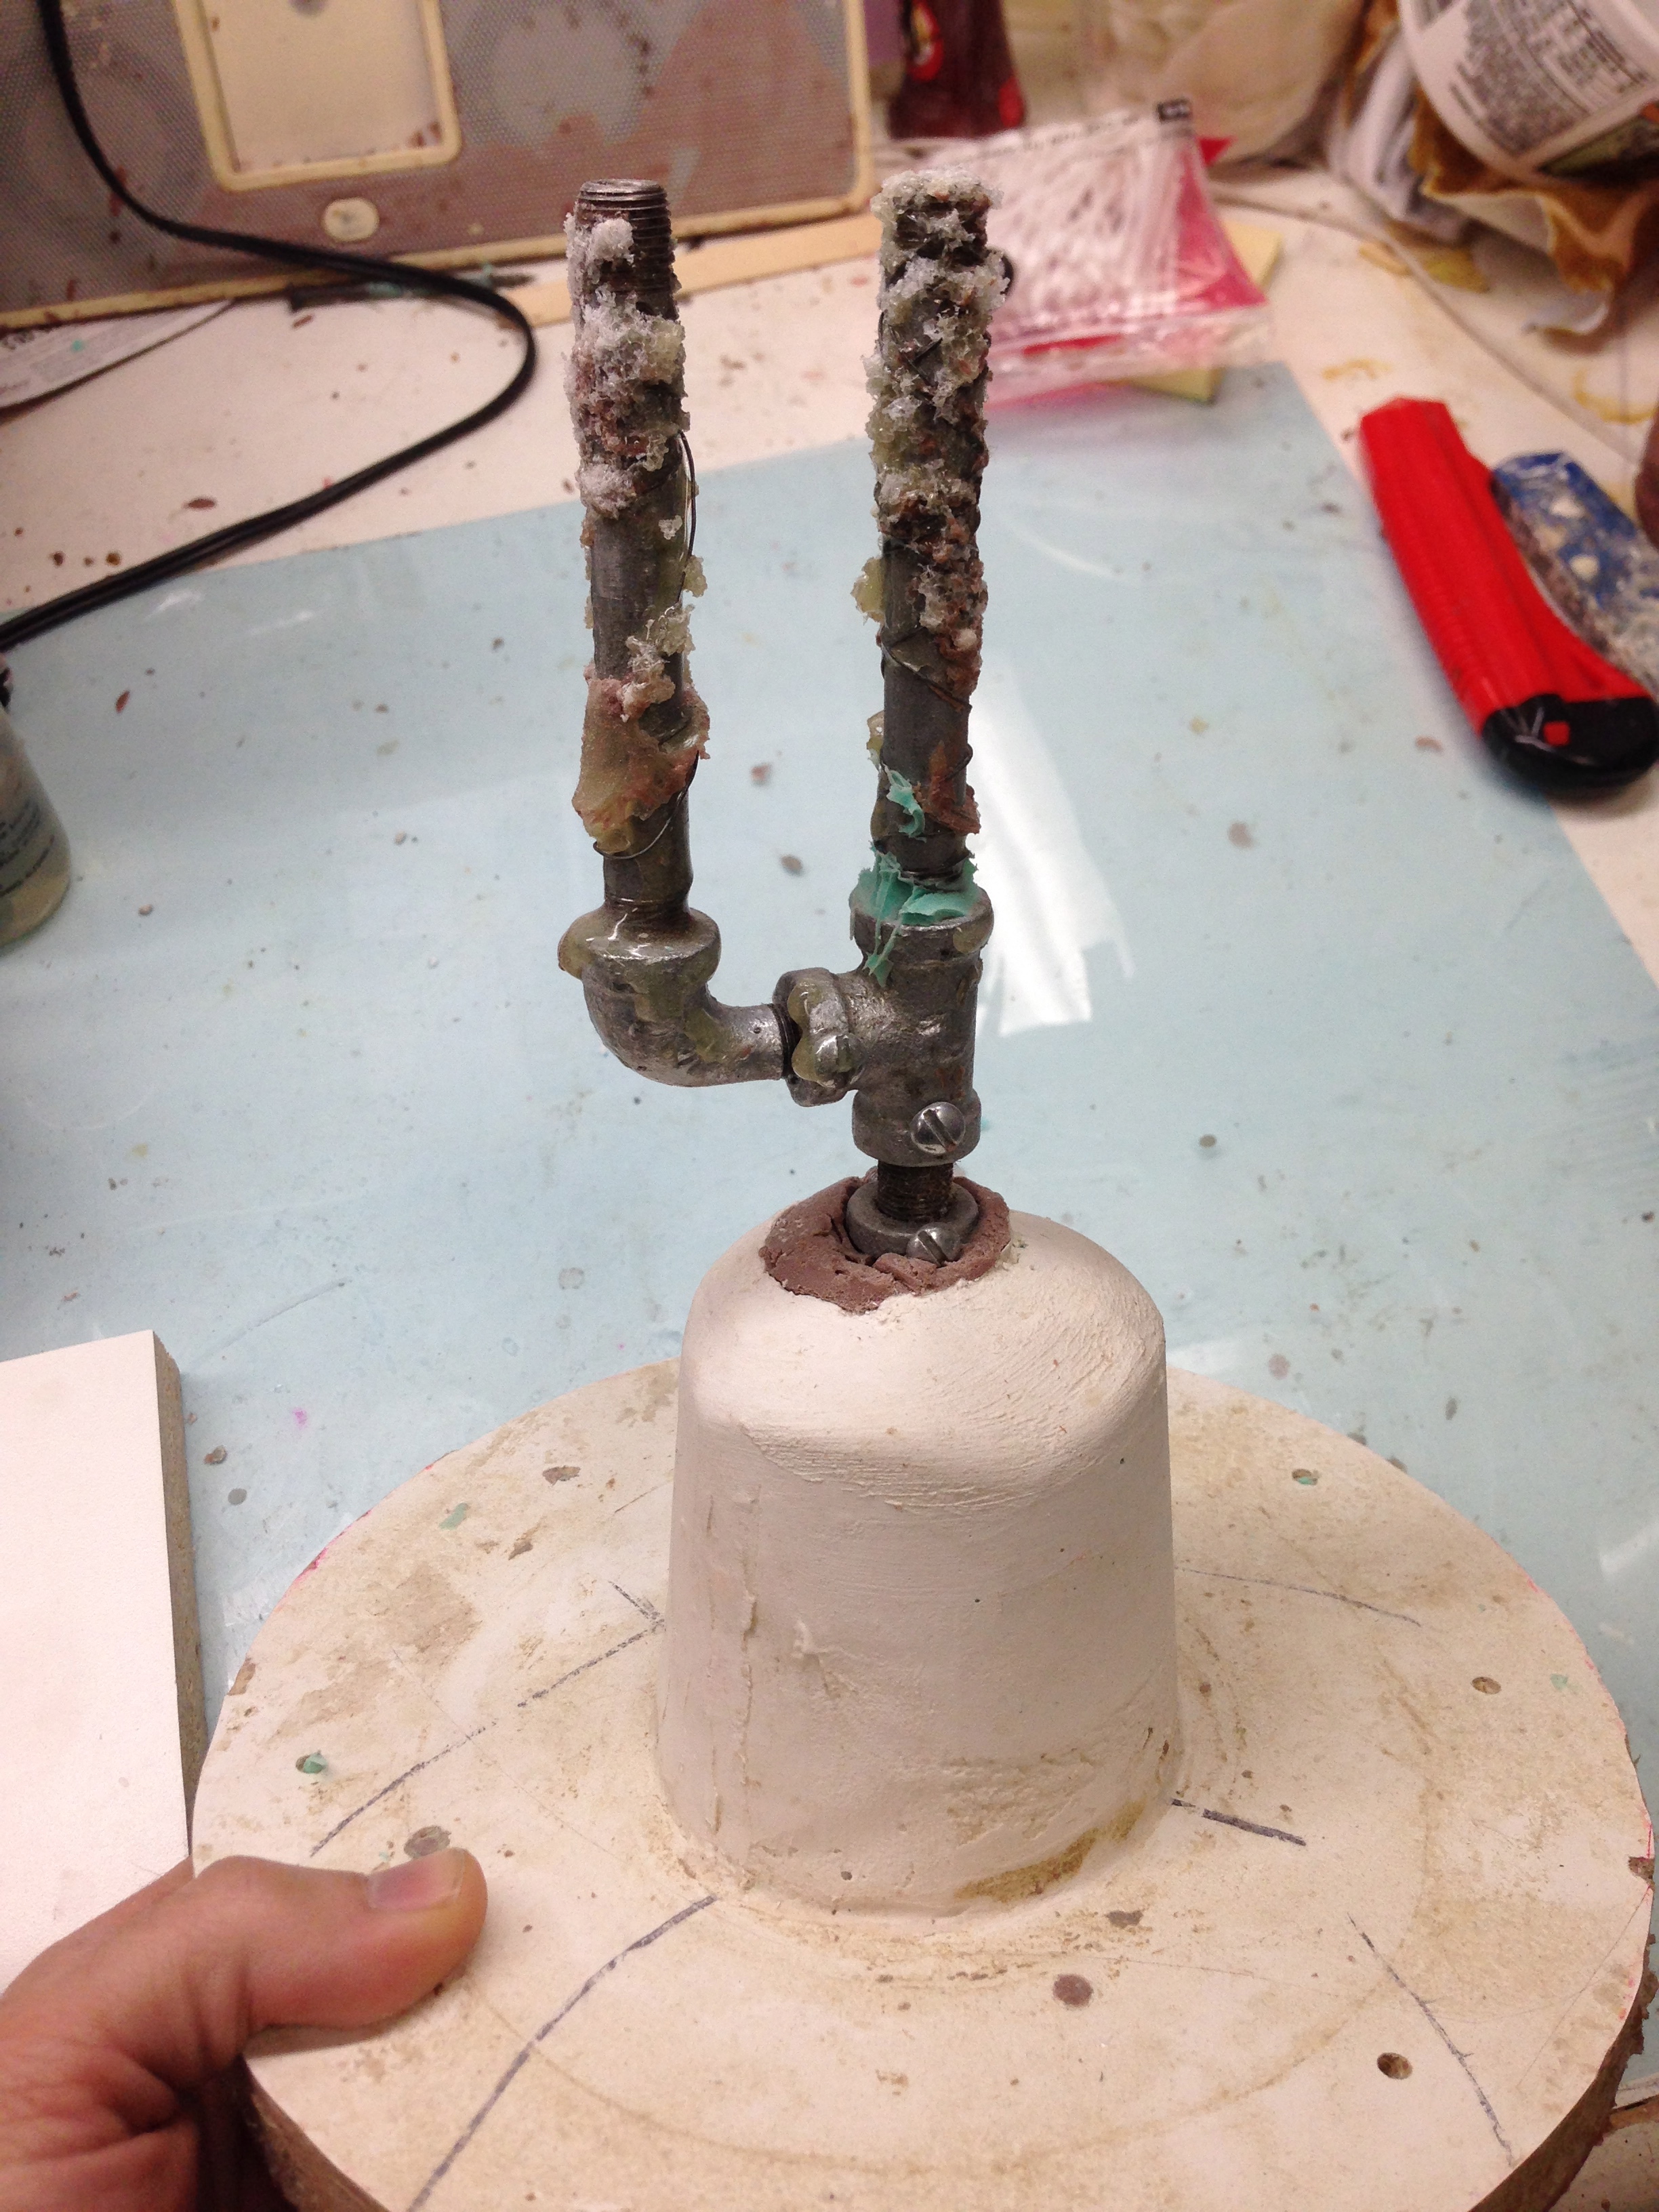
The trick was firmly attaching the sculpture to the board so it wouldn't move at all while in the molding process. If the sculpture moves, even a little out of place once I start the process, it can ruin the mold and possibly the entire sculpture. To firmly secure her, I devised a simple 2-pronged pipe which I inserted into her rear orifice. Having just 1 prong or pipe could allow the sculpture to spin. Two posts gives a mechanical hold preventing any spin. The image below is the simple 2-pipe-prong I built. I remember walking around the hardware store fitting pieces together praying it wasn't too big. Before I epoxied this into the sculpture I wrapped the pipes with floral wire to give them more teeth. The image below was taken post-molding and you can see that it took some of the styrofoam with it when I removed it from the sculpture.
Once the sculpture was completely secure on the pipes, they were incased in clay and would eventually serve as the pour spout in the silicone mold. Now it was time to start laying up the clay. This thin 3/8" of water-based clay, called bubblegum, is carefully placed over the sculpture. It's strange to see this but I have wrapped a plastic bag around the sculpture to keep the bubble gum clay from sticking to it. The equator-like ridge in the clay layup serves as the division point where I cut the mold apart.
Now the part I most dread...the fiberglass jackets! Fiberglass makes amazing molds and mold jackets but, they smell and are very toxic to work with. I think I spent four solid days wearing a respirator when making these molds. Below is a shot just before I was ready to pour the green rubber silicone into the mold jackets. The original 3/8' of clay was removed to provide the cavity to make the rubber mold.
Once the liquid silicone rubber is catalyzed, it firms up in about 8-16 hours. I use a 25 durometer silicone which basically means the hardness of the material. The higher the durometer the harder the material. 25 is pretty soft. Below is the front half of the mold after it was painstakingly cut with a special gutter key blade I make out of standard X-acto blades to create a uniform groove in the silicone to help the two halves key back up and fit together perfectly when casting parts out of the mold.
At this point I could have just started casting pieces, but I decided to make things a bit more complicated. I wanted a smooth interior surface that would accept a custom eyeball and registration points for all my internal LED light fixtures. Because the mouth cavity is so cavernous and essentially, anything ridged would lock into the mold, it had to be cut out of the mold and dealt with separately. The image below is the clay-filled front half with the acrylic eyeball. To do this, I melted Monstermakers clay to paint in layers until I built a sufficient 1/8" to 1/14" thickness. Once this was done I carefully cut the mouth cavity out. with the layered clay on top so the pieces would register when this was eventually cast.
Next was the interior mold over this clay skin, done again with 3/8" bubble gum clay, as seen in the photo below. The large tube in the bubblegum clay serves as the pour spout for the silicone once it has a fiberglass jacket. The smaller white PVC tube serves as the pour spout when actually casting the front half.
The same treatment was done to the back half of the original case mold with some modifications. The three black PVC rings in the image below are the brackets to hold the LED lights along with the strange clay posts that will hold the electronics. The white PVC tube again will serve as the pour spout. The little white circular ports labeled A and B, are spacers that will allow me to insert the translucent blue nodes seen in the back of the Cacodemon that turn from brown to blue when it is about to fire a plasma ball. To make these simple spacers I cast the nodes in the original mold first and remolded them separately then put them back into the mold before I painted in the clay. All of this was a lot of problem solving and trying to figure out how things would fit back together once made into separate pieces with each part cast in different colors. The clay ridge was created by casting just the ring of the front half and fitting it on to help key up the two halves. I have to thank my good friend Mike Biasi for helping me figure that out. This clay ridge was curtail in fitting everything back together.
Once I figured out that bit, it was time to finish molding the back half. I also forgot to mention that I was designing these molds to fit very snugly into my pressure chamber with an interior diameter of only 14 inches! This meant that my fiberglass mold jackets would be trimmed to the bare minimum.
Meanwhile, I was also making cup molds for each of the 12 horns and 2 large teeth. Below, my son Lucian helped me de-mold the horns.
The Cacodemon eyeball was very fun and challenging to make. First, I made a simple silicone cup mold of the acrylic sphere I used for the eye. Then I cast a resin copy and ground a flat area for the pupil (see pic 1 below). Next, I took some Monster clay and carefully sculpted a gross pupil, referencing cat eyes. These pupils essentially work like sphincter muscles (see pic 2). Once the sculpt was complete, I molded it in a silicone cup mold, then cast an eye using a phosphorescent yellow pigment. Carefully, I painted it green but made sure that the yellow would still shown through. In the fourth image below, check out the painted eye beneath an LED light pad. Finally, I put that painted eye into the first mold of the acrylic sphere and filled it with water clear translucent resin to create the cornea over the pupil (see pic 3). My first attempt at this failed. The water clear resin I used proved to be unstable with the thin layer I was making over the pupil. All the eye parts were cast in my pressure pot to reduce air bubbles. This pressure pot with 60 lbs of air pressure in it, shrinks the bubbles making them invisible to the naked eye until the resin sets up which is usually in about 2-4 hours. This worked fantastically at first, but about a day after the eye was finished, the water-clear resin started to bubble and delaminate from the pupil. The resin was not completely set up. To resolve this I kept the mold in the pressure pot for 2 days to make sure the resin set up properly. In retrospect, I should have purchased newer clear resin.
With almost all the molds being complete, it was time to start casting parts! Below is the front half mold fit very snugly into my pressure pot. The PVC tube sticking out with the orange funnel is the extended pour spout. The orientation of the mold is such that when the resin is poured it fills from the bottom up. This prevents air from being trapped in the mold during the pour. I have three tiny vents at the top of the mold that bleed resin indicating the mold is filled.
The front half came out beautifully! I should note that before I put the mold in the pressure pot I carefully cast only the teeth in the mold in plain white resin. Then I closed the mold and put it in the pressure pot to cast the remaining in a bright red color. This basic color differentiation helps immensely when painting later. I think it also looks like the Cacodemon has rabies!
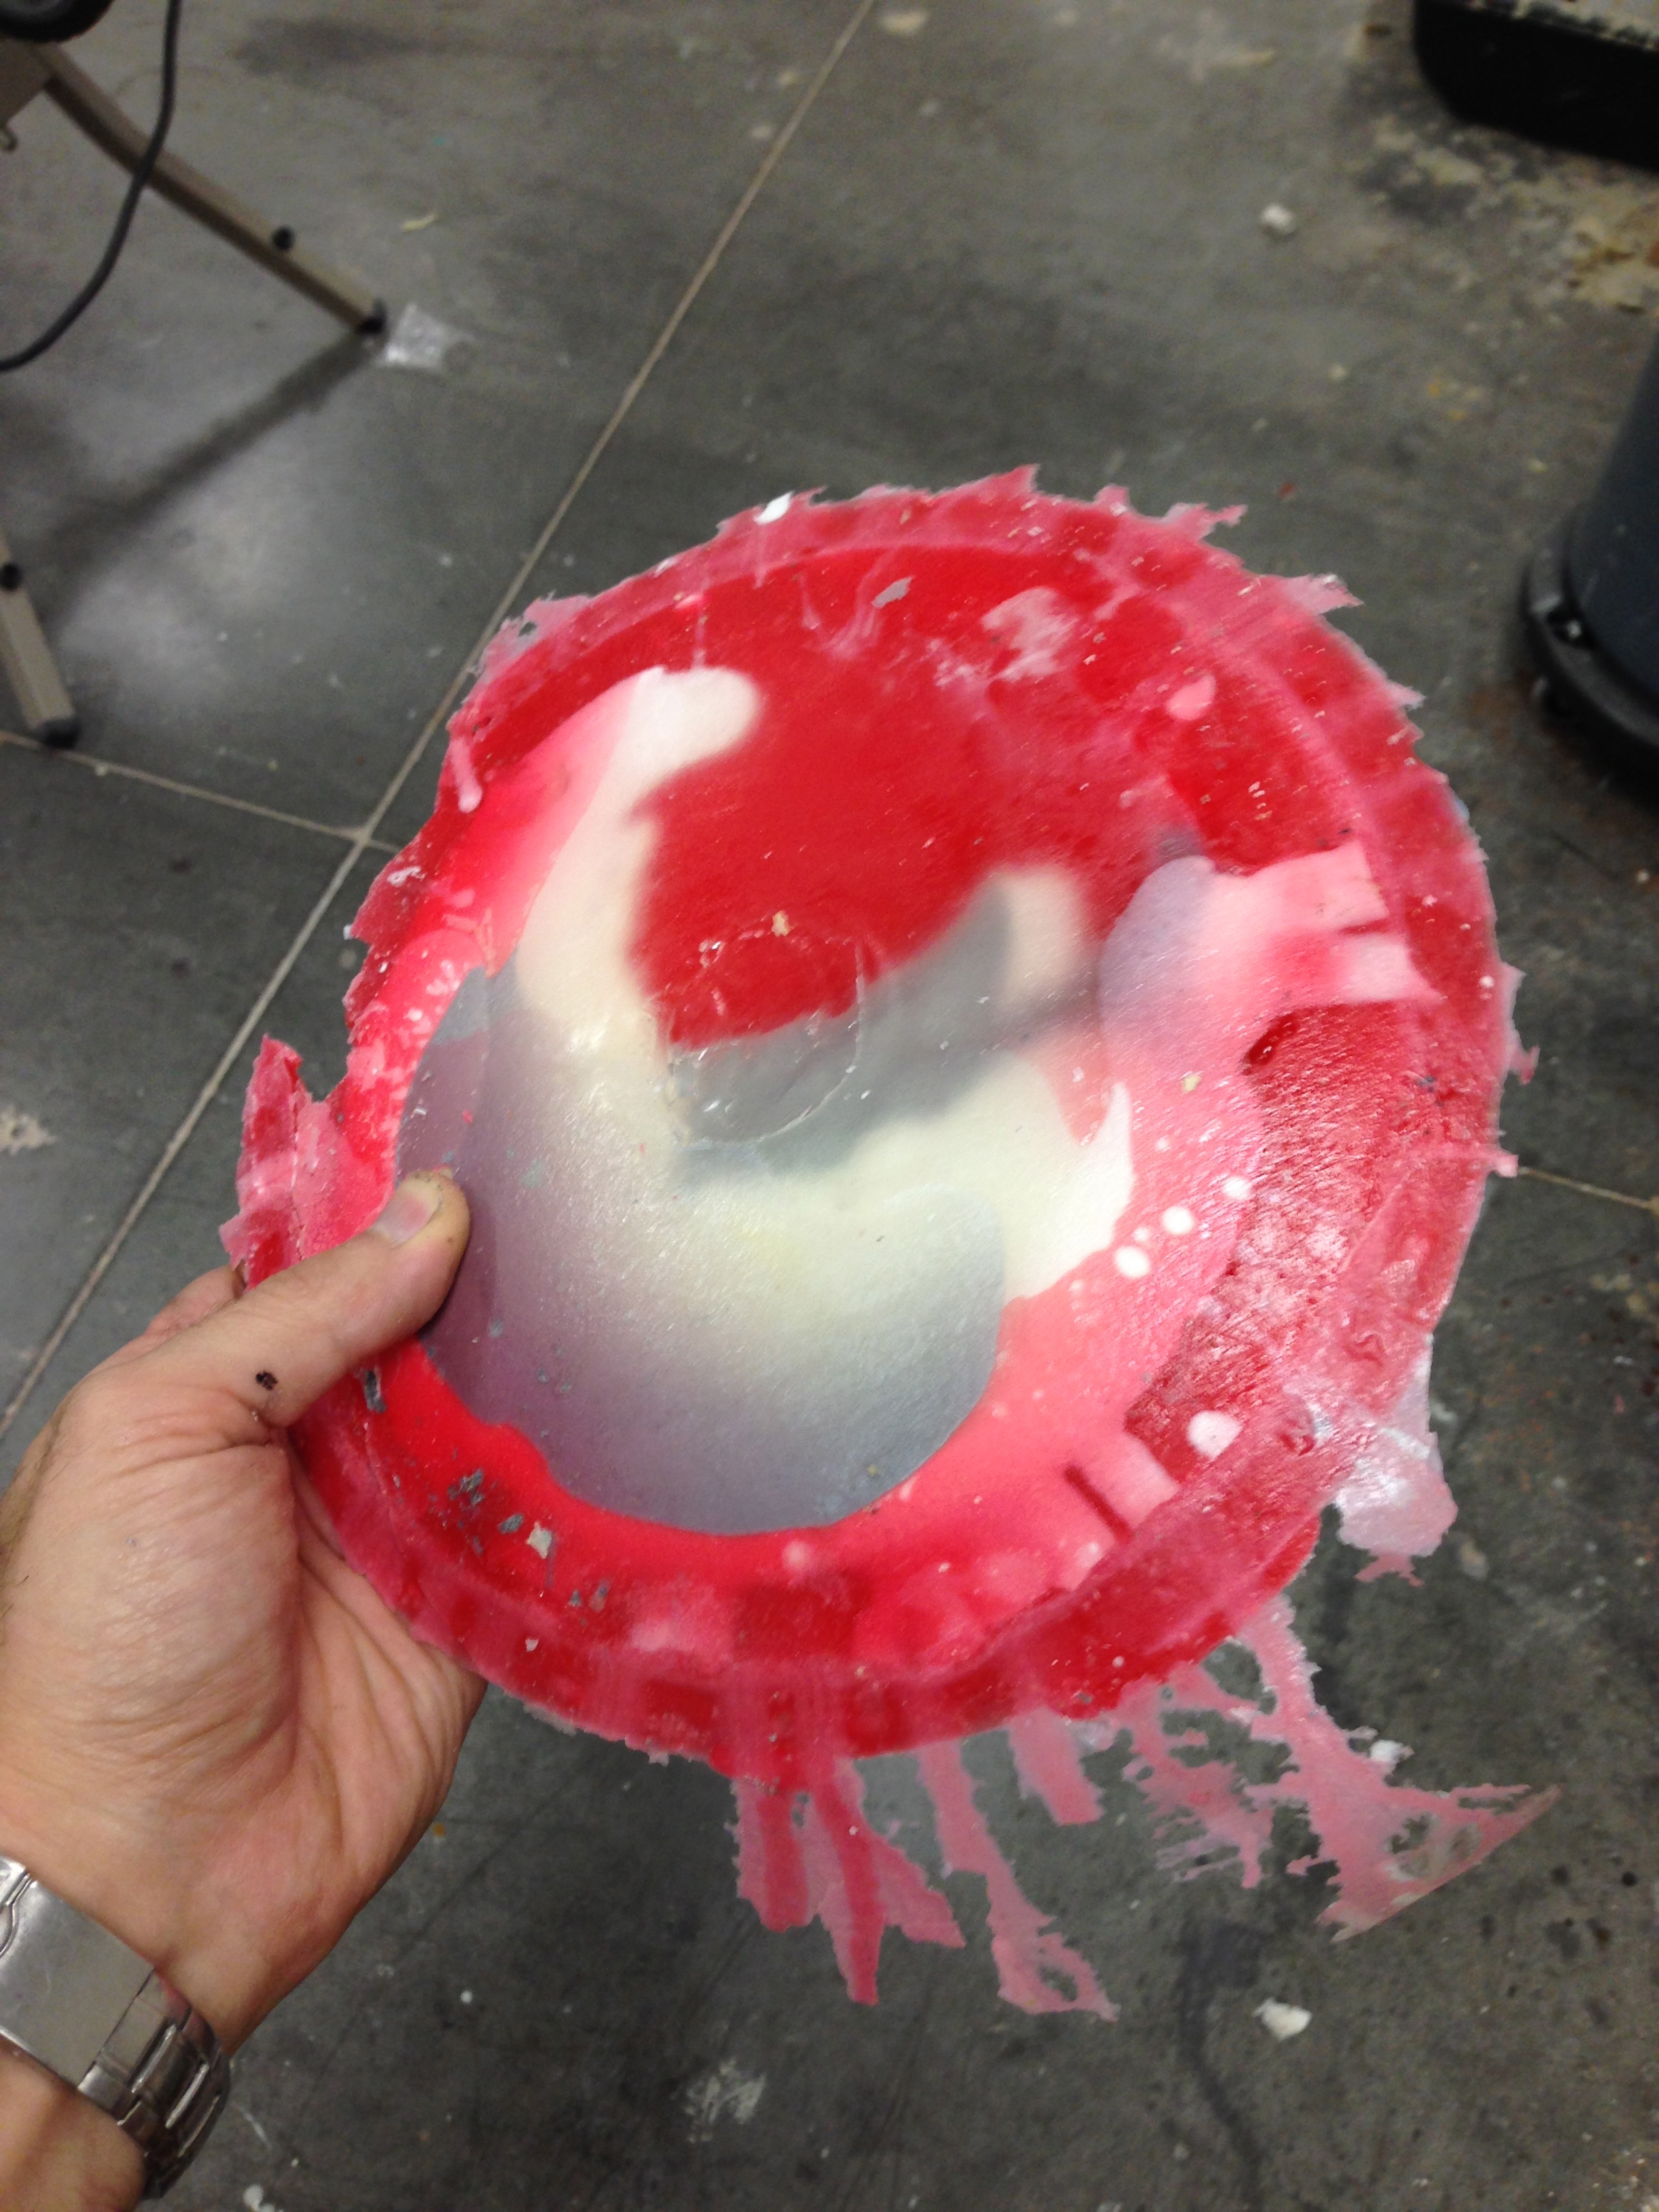
The second half proved to be a bit more challenging. Essentially, I had to make a butt-plug to negate the original pour spout in favor of the PVC spout on the inside of the mold. This and other factors lead to a massive leak in the mold. A large portion of 1800 grams of red tinted resin ended up at the bottom of my pressure pot. I had to use a 4 foot crowbar to get it out :(
With a little more trail and error I finally got the back half mold to seal properly. Before long, I had 2 halves to reassemble. I started by first painting the inside with black primer to obscure any unwanted light getting though, then silver over that. The silver helps to reflect the light. Next was anchoring the light pads and electronics. In the below image you can see the blue nodes encased in the back half now along with all the light pads. I should also note that all the horns were glued then screwed into place.
The final step was mounting it to a base then attaching the halves together. Even though the halves fit well together there was a 1/16"-1/4" gap in some places making the seam very noticeable. To fix this, Ifound places to screw them together, then I thickened some red pigmented resin with Cabosil which is very toxic for our lungs, put it in large syringes and filled the gaps. This worked beautifully as a seaming agent. The only downside is that if I ever need to get back into the inside of the Cacodemon, I'd have to break it apart. Below is a video I made after it was completed to show it off a bit. I especially had fun making a latex version of the Cacodemon to make the death scene.
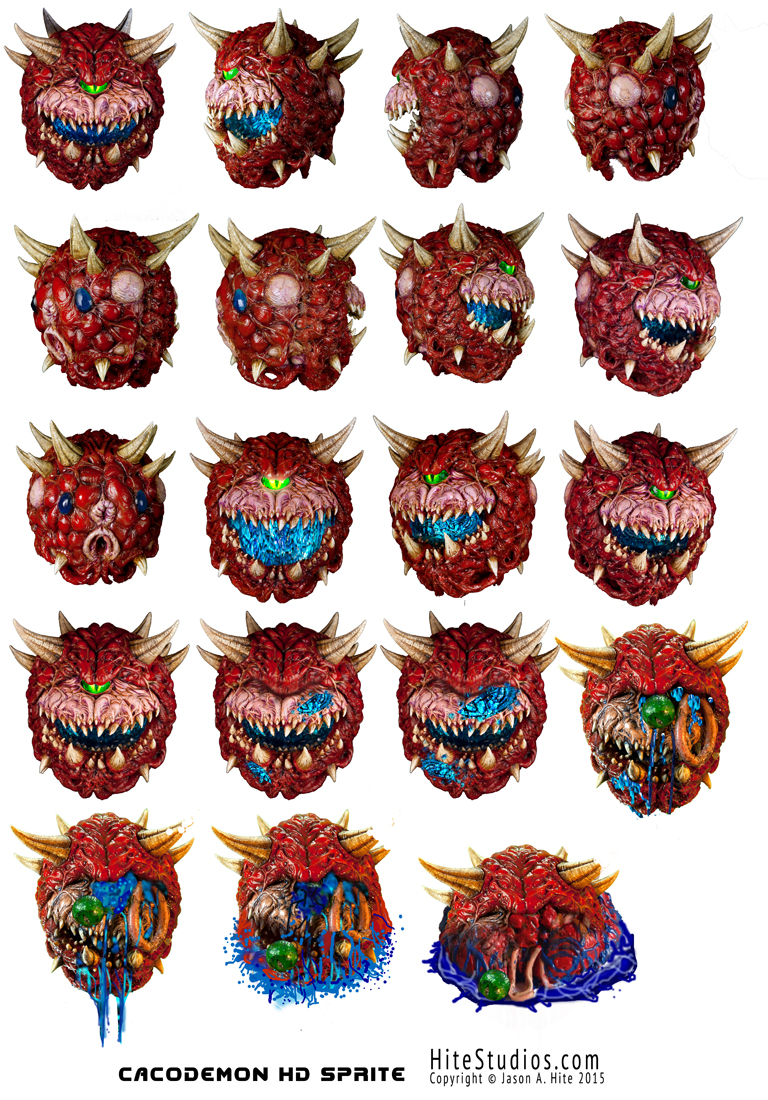
Someday, I need to make a Cacodemon that can fly and shoot, but that is for another time. If you hung on and read the entire post I have a treat for you! Leave a comment and I will send you my high resolution HD sprites for this Cacodemon, as seen below! If you are interested in purchasing a Cacolantern you can find different offerings in my Etsy store here.
Enjoy- Jason A. Hite


